
Why organize your Google Drive?
If you’ve become overwhelmed by managing your Google Drive, you’re not alone. In my work as a Lead SLP, I’ve found that many skilled clinicians have encountered difficulties with finding, saving, sharing, and organizing their files. This tends to result in a black hole of sorts, leaving the clinician feeling frustrated.
Need motivation? Here are some reasons to take the plunge. With an organized Google Drive you can:
- rediscover activities and handouts you forgot about
- stop asking people to resend things
- find stuff quickly
- feel like the empowered professional that you are!
Before you start
Assess your current Google Drive skill level
Read the descriptions below and decide which one best fits you. Don’t worry, everyone can learn how to use Google Drive!
Advanced

You’re an advanced user if you already have your Google Drive organized into folders and actively manage new files using your system. Way to go! Read on for ideas to see if you want to make any changes to your current system.
Intermediate

You’re an intermediate user if you know the basics of Good Drive, such as how to create a folder and upload files, but you don’t really have an organizational system set up that is working for you. This article will give you some ideas that you can use right away.
Beginner

You’re a beginner if you’re new to Google Drive or you don’t remember how to make a folder or upload a file. I suggest going through the slideshow tutorial below, to give yourself a brief overview of Google Drive. Don’t worry, we’ll go through things in more detail in a bit. You can totally do this!
Google Drive basics
Slideshow tutorial for beginners
Credit: Slideshow tutorial created by Jenilyn Umali
Get logged in
Use a computer, for now at least
Use your computer, rather than your phone, to organize your Google Drive initially. My instructions are based on where things are located on a computer screen. Once you’ve got a system going, you can install the Google Drive app on your phone or tablet and use it to access your files on the go.
Make sure you’re using the right account
If you have a Google account associated with your work email address, I would suggest you pick that Google Drive to organize first (as opposed to your personal email address’s Google Drive) because sharing files with colleagues will be easiest when done from your work Google account. If you don’t have a Google account, you can get one for free.
Let’s make sure you’re logged in with the account you want to use before we go any further.
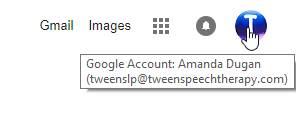
Open a new tab in Google Chrome (or another supported browser) and go to www.google.com. Look at the top right corner. You should see a circle. If you hover over it with your cursor, it will tell you if you’re logged in and what account you’re using. Here’s what mine looks like.
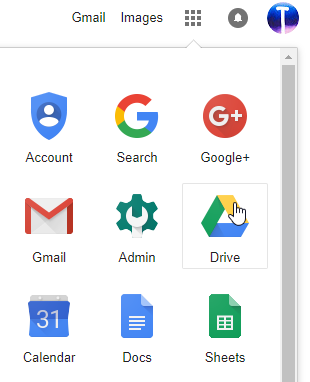
Go ahead and open your Google Drive now. Below is a picture showing how to open it.
Once you’ve got Google Drive open, it’s time to start organizing!
Folders are your friend

One reason Google Drive overwhelms people is that our files add up over time. Without an organizational system it can be hard to sift through hundreds of files to find the one you’re looking for.
Folders are an ideal way to clean up your view so that when you open up your Google Drive, your files are sorted into categories.
One thing I love about Google Drive is that you can easily create folders within folders. This allows you to categorize things broadly and then separate each parent category into subcategories. I’ll show you how to do it.
Create a folder for your activities
A large portion of my files are activities and word lists that I use in my sessions. I’m guessing yours are too. Let’s organize these first.
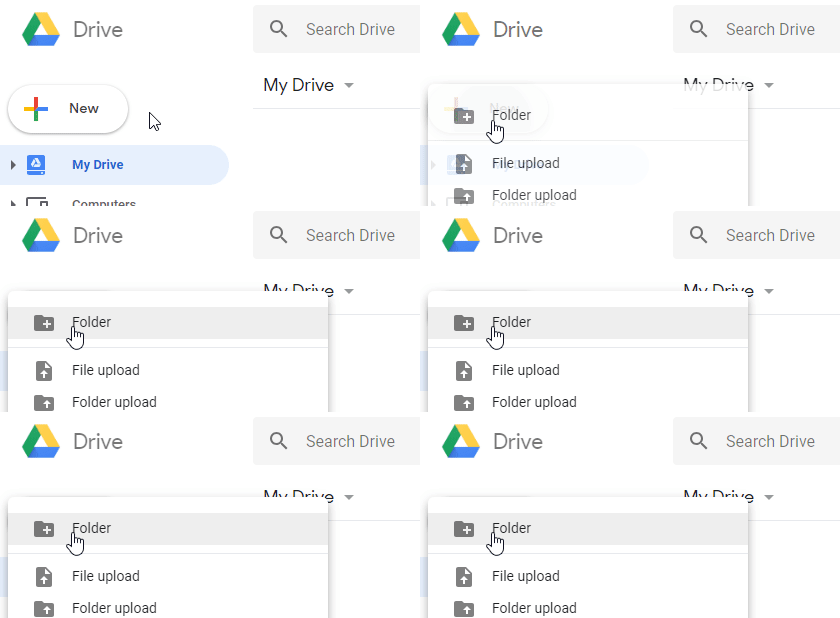
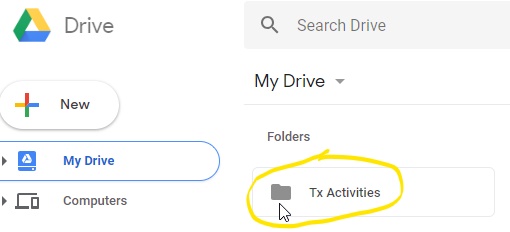
To start, create a folder and name it Tx Activities.
Your folder will look something like the one below.
Parent categories and subcategories
This folder is going to be a parent category, meaning that we will be creating folders within it to organize your activities further. The folders we create within the Tx Activities folder are called subcategories because they are all part of the larger category of Tx Activities.
Ready to create your subcategories? Open the Tx Activities folder by double clicking on it.
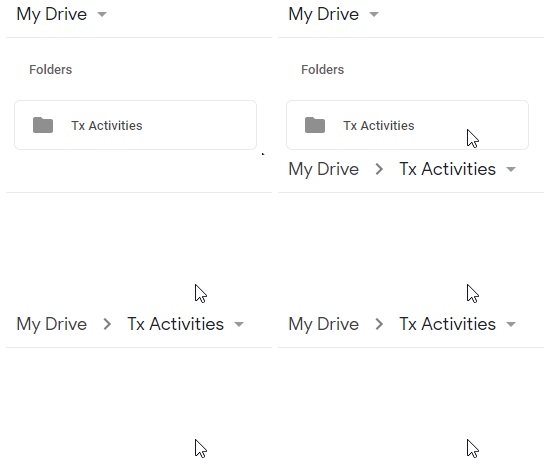
You’ll notice that your screen now says My Drive > Tx Activities. That’s how you’ll know you’ve opened the Tx Activities folder and are inside of that folder. Anything you create or add now will be inside of that folder too. This is what you want, because you’re about to create new folders within the Tx Activities folder.
Go ahead now and create a folder for each subcategory of your therapy activities (articulation, language, fluency, etc). Don’t worry about that fact that you don’t actually have any activities in these folders yet. We’ll get to that in a bit.
Below is what mine looks like. Notice that all of these folders are inside of my Tx Activities folder. If yours aren’t, click and drag them on top of the Tx Activities folder to drop them inside (or click here for more help).

Woohoo! You just created a folder structure that is going to save you tons of time when you need to find your therapy activities. Now let’s add activities!
Add activities to the folders you just created
Before you get started with the next step, you need to have an electronic file version of your therapy activities on your Google Drive, your computer, or a thumb drive. By electronic file version, I mean a PDF, document, etc.
If your files are already in your Google Drive
All you need to do is move them to one of the new folders you just created. Not sure how? Read these instructions from Google on how to move a file.
Any files that someone shared with you from their Google Drive will be stored in a section of your Drive called Shared with me. If you aren’t sure how to find and move these files into your newly created folders, read these instructions.
If your files are on your computer or a thumb drive
It’s easy to upload files (and even folders) to your Google Drive from your computer or thumb drive. Here are instructions for how to do it.
What if you only have paper copies of your activities?
You will need to scan paper copies and save them as PDF files. Most newer photocopiers have an option to scan and email paper documents, or you can download a document scanning app onto your phone.
Once you’ve scanned you documents, save them on your computer and then add them to one of your folders on your Google Drive.
Other folders you’ll want to have
To get the most out of your Google Drive, there are several other folders I would highly recommend you create.
Data sheets folder
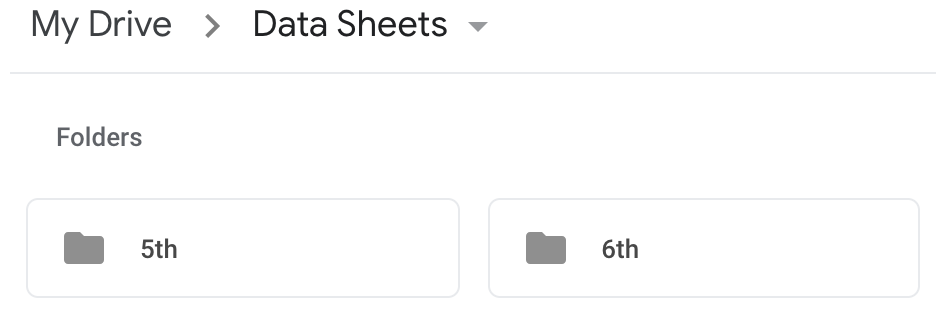
I create data sheets for my sessions using Google Docs and store them in a Data Sheets folder with folders inside of it for each grade level.
Homework folder
I use a pocket sized homework program with my students.
If you haven’t heard of pocket sized homework, here’s a summary: I send home little sheets that take about 5 minutes to complete. The students have a parent sign the back and return the sheets by placing them in a bag hanging outside my door. Once a week I do a raffle drawing by pulling a homework sheet out of the bag, and the winner gets a prize. My students love it, even the older ones. You can read more about it here.
Whatever you like to use for homework, it makes sense to organize it so you can easily print it out when needed.
Policies folder
If you only make one folder, let this be it. Your lead SLP will thank you! Many questions can be answered by consulting your state and local policy manuals. Keeping these documents in a central location will ensure that you use them on a regular basis.
If you don’t already have an electronic copy of your state’s policies, they’re probably online and can be found with minimal digging.
When I need to find something specific, I open the document with Adobe and use their “Find” feature. This is so useful that I created a short Google Slides presentation with directions about how to scan a PDF document for a keyword.
How to quickly search a document using Adobe
Parent & teacher handouts folder
Communication with parents and teachers is so essential, and I’m betting you’ve made and acquired some pretty awesome handouts over the years. You’ll increase your chances of actually using your handouts if you put them in a folder.
While you’re at it, make sure you grab my free speech therapy guide for teachers and parents.
Credentials & reimbursement folder
I like to save copies of documentation concerning my license, professional development, and travel/ fee reimbursement. I figure that by tossing everything into a folder, I can locate it later if the need arises.
You can color code your folders!
Want to make a folder stand out from the rest? Give it some color! I would suggest doing this for your most commonly used folders.
How to change the color of your folders
- Right click on the folder.
- Select change color.
- Click on the color you want.
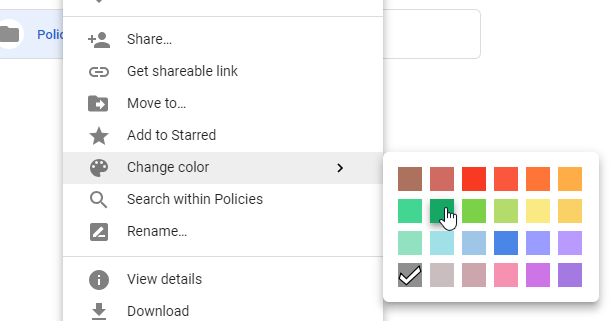
Here’s how it looks now. Exciting stuff!

Final thoughts…
You don’t have to use folders for every single file.
If you have files you access on a regular basis, you might want to just stick them into the main My Drive section, rather than in a folder. I keep my schedule and goal bank spreadsheets in this main section.
Don’t forget about your files if you change jobs.
If you happen to leave your current job or decide to close your Google account, make sure you either download all of your files that you want to save, or transfer ownership of them to yourself at a different email address before your account is deleted.
Way to go!

Give yourself a high five! Organizing your Google Drive will make your work life a little bit less hectic, which is something we can all use.


 Amanda Dugan, MS, CCC-SLP is an ASHA certified speech-language pathologist. She works full-time as a school SLP in North Carolina. Amanda has experience serving as Lead SLP and has spent more than 10 years molding young minds. She’s provided speech therapy to all ages of children, from toddlers to teens, and especially enjoys "tweens".


